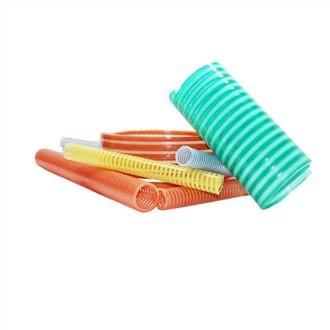
Installing PVC pipes on a vertical wall can seem like a daunting task, but with the right tools, materials, and techniques, it can be a manageable DIY project. As a PVC Pipe supplier, I've seen firsthand the benefits of using PVC pipes for various applications, from plumbing to irrigation. In this blog post, I'll guide you through the process of installing PVC pipes on a vertical wall, step by step.
Step 1: Plan Your Installation
Before you start installing PVC pipes on a vertical wall, it's essential to plan your installation carefully. Here are some key considerations:
- Determine the Purpose: Decide what the PVC pipes will be used for, such as carrying water, gas, or air. This will help you choose the right type and size of PVC pipes.
- Measure the Wall: Measure the length and height of the wall where you'll be installing the PVC pipes. This will help you determine how much pipe you'll need and where to place the brackets.
- Mark the Wall: Use a level and a pencil to mark the location of the PVC pipes on the wall. Make sure the marks are straight and level.
- Choose the Right PVC Pipes: As a PVC Pipe supplier, I recommend choosing high-quality PVC pipes that are suitable for your application. You can find a wide range of PVC pipes on our website, including Plastic Large Diameter Pvc Pipe, Hard Colored Pvc Pipes, and 7 Inch Diameter Pvc Pipe.
Step 2: Gather Your Tools and Materials
Once you've planned your installation, it's time to gather the tools and materials you'll need. Here's a list of the essential tools and materials:
- PVC Pipes: Choose the right type and size of PVC pipes for your application.
- PVC Pipe Fittings: You'll need PVC pipe fittings, such as elbows, tees, and couplings, to connect the PVC pipes.
- PVC Pipe Glue: Use PVC pipe glue to secure the PVC pipes and fittings together.
- Pipe Cutters: Use pipe cutters to cut the PVC pipes to the desired length.
- Measuring Tape: Use a measuring tape to measure the length of the PVC pipes and mark the cutting points.
- Level: Use a level to ensure that the PVC pipes are straight and level.
- Drill: Use a drill to make holes in the wall for the brackets.
- Screwdriver: Use a screwdriver to attach the brackets to the wall.
- Brackets: Use brackets to support the PVC pipes on the vertical wall.
Step 3: Cut the PVC Pipes
Once you've gathered your tools and materials, it's time to cut the PVC pipes to the desired length. Here's how to do it:
- Measure the PVC Pipes: Use a measuring tape to measure the length of the PVC pipes and mark the cutting points with a pencil.
- Cut the PVC Pipes: Use pipe cutters to cut the PVC pipes at the marked points. Make sure the cuts are straight and clean.
- Deburr the PVC Pipes: Use a deburring tool or sandpaper to remove any rough edges or burrs from the cut ends of the PVC pipes.
Step 4: Install the Brackets
Once you've cut the PVC pipes, it's time to install the brackets on the vertical wall. Here's how to do it:


- Mark the Location of the Brackets: Use a level and a pencil to mark the location of the brackets on the wall. Make sure the marks are straight and level.
- Drill Holes in the Wall: Use a drill to make holes in the wall at the marked locations. Make sure the holes are the right size for the screws or anchors.
- Attach the Brackets to the Wall: Use a screwdriver to attach the brackets to the wall using screws or anchors. Make sure the brackets are securely attached to the wall.
Step 5: Connect the PVC Pipes and Fittings
Once you've installed the brackets, it's time to connect the PVC pipes and fittings together. Here's how to do it:
- Apply PVC Pipe Glue: Apply a thin layer of PVC pipe glue to the outside of the PVC pipe and the inside of the PVC fitting. Make sure the glue is evenly distributed.
- Insert the PVC Pipe into the Fitting: Insert the PVC pipe into the fitting and twist it slightly to ensure a secure connection. Hold the pipe and fitting together for a few seconds to allow the glue to dry.
- Repeat the Process: Repeat the process for all the PVC pipes and fittings until the entire system is connected.
Step 6: Install the PVC Pipes on the Brackets
Once you've connected the PVC pipes and fittings together, it's time to install the PVC pipes on the brackets. Here's how to do it:
- Lift the PVC Pipes onto the Brackets: Lift the PVC pipes onto the brackets and align them with the marks on the wall. Make sure the pipes are straight and level.
- Secure the PVC Pipes to the Brackets: Use zip ties or pipe clamps to secure the PVC pipes to the brackets. Make sure the pipes are tightly secured to the brackets.
Step 7: Test the PVC Pipe System
Once you've installed the PVC pipes on the brackets, it's time to test the PVC pipe system to make sure it's working properly. Here's how to do it:
- Turn on the Water or Gas Supply: Turn on the water or gas supply to the PVC pipe system and check for any leaks.
- Check the Pressure: Use a pressure gauge to check the pressure in the PVC pipe system. Make sure the pressure is within the recommended range.
- Inspect the PVC Pipes and Fittings: Inspect the PVC pipes and fittings for any signs of damage or wear. Make sure the pipes and fittings are securely connected and there are no leaks.
Step 8: Maintain the PVC Pipe System
Once you've tested the PVC pipe system and it's working properly, it's important to maintain it regularly to ensure its longevity and performance. Here are some tips for maintaining the PVC pipe system:
- Check for Leaks Regularly: Check the PVC pipe system for any leaks regularly and repair them immediately if you find any.
- Clean the PVC Pipes: Clean the PVC pipes regularly to remove any dirt, debris, or sediment that may accumulate inside the pipes.
- Inspect the PVC Pipes and Fittings: Inspect the PVC pipes and fittings for any signs of damage or wear regularly and replace them if necessary.
- Protect the PVC Pipes from the Elements: Protect the PVC pipes from the elements, such as sunlight, heat, and cold, to prevent them from cracking or becoming brittle.
Conclusion
Installing PVC pipes on a vertical wall can be a challenging but rewarding DIY project. By following the steps outlined in this blog post, you can install PVC pipes on a vertical wall safely and effectively. As a PVC Pipe supplier, I'm committed to providing high-quality PVC pipes and fittings for all your plumbing and irrigation needs. If you have any questions or need help with your PVC pipe installation, please don't hesitate to contact us. We're here to help you every step of the way.
References
- "PVC Pipe Installation Guide." Home Depot.
- "How to Install PVC Pipe." Lowe's.
- "PVC Pipe Fittings: A Guide to Choosing the Right Ones." PlumbingSupply.com.