Installing PVC pipes for a drainage system is a crucial task that requires careful planning and execution. As a PVC pipe supplier, I understand the importance of providing high - quality pipes and accurate installation guidance. This blog post will walk you through the step - by - step process of installing PVC pipes for a drainage system.
Step 1: Planning and Design
Before you start the installation, a well - thought - out plan is essential. First, assess the area where the drainage system will be installed. Consider the slope of the ground, as PVC pipes in a drainage system need to have a proper slope to ensure that water flows smoothly towards the desired outlet. A common rule of thumb is to have at least a 1/8 - inch to 1/4 - inch slope per foot of pipe length.
Measure the distance from the source of the water (such as a roof downspout or a sump pump) to the drainage outlet. This will determine the length of the PVC pipes you need. Also, identify any obstacles in the path, such as trees, rocks, or existing structures. You can use a tape measure and a level to take accurate measurements.
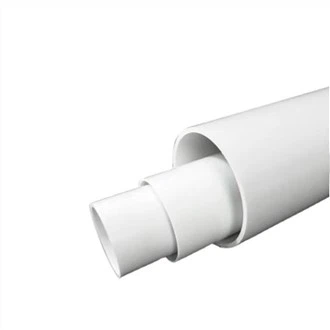
Based on your measurements and the layout of the area, create a detailed design of the drainage system. Decide on the number and type of PVC pipe fittings you will need, such as elbows, tees, and couplings. For larger - scale drainage systems, you might want to consider using PVC 6 Inch Water Pipe, which can handle a greater volume of water.
Step 2: Gathering Materials and Tools
Once you have your plan in place, it's time to gather the necessary materials and tools. As a PVC pipe supplier, I can offer a wide range of PVC pipes and fittings suitable for drainage systems. You'll need PVC pipes of the appropriate diameter and length, which can vary depending on the volume of water the system needs to handle. For agricultural drainage, Pvc Pipe Agricultural Pipes are a great option.
In addition to the pipes and fittings, you'll need PVC primer and cement. The primer is used to clean and prepare the surfaces of the pipes and fittings for bonding, while the cement creates a strong, permanent seal. Other materials include gravel or crushed stone for the base of the trench, landscape fabric to prevent soil erosion, and stakes and string to mark the path of the trench.
The tools required for the installation include a hacksaw or PVC pipe cutter to cut the pipes to the correct length, a measuring tape, a level, a shovel for digging the trench, and a trowel for spreading the gravel.
Step 3: Digging the Trench
Digging the trench is a labor - intensive but critical step. Use the stakes and string to mark the path of the trench according to your design. The width of the trench should be wide enough to accommodate the pipes and allow for some extra space on the sides for easy installation. A good rule is to make the trench about 2 - 3 inches wider than the diameter of the pipe.
The depth of the trench depends on several factors, such as the local frost line, the type of soil, and the slope requirements. In general, the trench should be deep enough to provide adequate cover for the pipes to protect them from damage. Start digging the trench slowly, using a shovel to remove the soil. Make sure to keep the bottom of the trench as level as possible and follow the planned slope.
After digging the trench, add a layer of gravel or crushed stone at the bottom. This layer helps to provide a stable base for the pipes and allows for proper drainage. Use a trowel to spread the gravel evenly and use a level to ensure that it has the correct slope.
Step 4: Cutting and Assembling the Pipes
Measure and cut the PVC pipes to the required lengths using a hacksaw or a PVC pipe cutter. Make sure to make clean, straight cuts. After cutting, use a file or sandpaper to smooth the edges of the pipes to remove any burrs or rough spots.
Before assembling the pipes, apply the PVC primer to the outside of the pipe and the inside of the fitting. The primer should be applied evenly and allowed to dry for a few seconds. Then, apply a generous layer of PVC cement to the same surfaces. Immediately insert the pipe into the fitting and twist it a quarter - turn to spread the cement evenly. Hold the pipe in place for about 30 seconds to allow the cement to set.
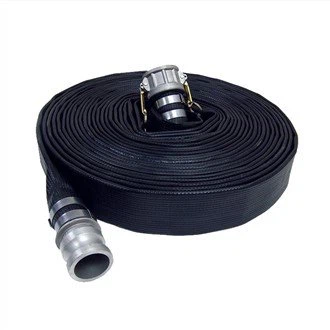
Continue assembling the pipes and fittings according to your design. Use elbows to change the direction of the pipes and tees to create branches in the drainage system. If you need a flexible connection, PVC Water Pipe Hose can be a suitable option in some cases.
Step 5: Installing the Pipes in the Trench
Once the pipes are assembled, carefully lower them into the trench. Make sure the pipes are properly aligned with the slope and the designed path. Use supports or blocks to hold the pipes in place if necessary. Check the slope of the pipes using a level to ensure that water will flow towards the outlet.
If there are joints or connections in the trench, make sure they are secure and properly sealed. You can use additional cement or tape to reinforce the joints if needed. As you install the pipes, cover them with a layer of landscape fabric to prevent soil from clogging the pipes. Then, backfill the trench with soil, making sure not to apply too much pressure on the pipes.


Step 6: Testing the Drainage System
After the pipes are installed and the trench is backfilled, it's time to test the drainage system. You can use a garden hose to pour water into the system at the source (such as a downspout). Observe the flow of water through the pipes and check for any leaks or blockages.
If you notice any leaks, shut off the water and mark the location of the leak. Disassemble the affected joint, clean the surfaces, and re - apply the primer and cement. Test the system again until you are satisfied that there are no leaks and the water is flowing smoothly towards the outlet.
Step 7: Finishing Touches
Once the system is tested and working properly, you can add any finishing touches. This may include covering the area around the drainage outlet with rocks or gravel to prevent erosion. You can also plant grass or other vegetation over the backfilled trench to blend it in with the surrounding landscape.
As a PVC pipe supplier, I am committed to providing high - quality PVC pipes and excellent customer service. Whether you are working on a small home drainage project or a large - scale agricultural installation, our products are designed to meet your needs. If you are interested in purchasing PVC pipes for your drainage system, I encourage you to reach out to our sales team for further details, technical support, and pricing information. Contact us to discuss your project requirements and start the procurement process.
References
- "PVC Pipe Installation Guide" by the Plastic Pipe and Fittings Association
- "Drainage System Design and Installation" from a local building code handbook