How to install PPR pipes?
PPR (Polypropylene Random Copolymer) pipes have gained immense popularity in plumbing systems due to their durability, corrosion resistance, and ease of installation. As a PPR pipe supplier, I understand the importance of providing not only high - quality products but also useful information on how to install them correctly. In this blog, I will guide you through the step - by - step process of installing PPR pipes.
1. Planning and Preparation
Before you start the installation, it is crucial to have a well - thought - out plan. First, measure the area where the pipes will be installed. This includes determining the length of the pipes required, the number of fittings such as elbows, tees, and couplings, and the position of the pipes in relation to other fixtures in the building.
Make a detailed sketch of the plumbing layout. Mark the locations of the water sources, faucets, toilets, and other fixtures. This will help you visualize the entire system and ensure that all the connections are properly planned.
Gather all the necessary tools for the installation. You will need a pipe cutter, a PPR pipe welding machine (also known as a pipe fusion tool), measuring tape, marker, and a deburring tool. The pipe cutter should be sharp enough to make clean cuts through the PPR pipes. The welding machine is used to join the pipes and fittings together by melting the surfaces and creating a strong, leak - proof bond.
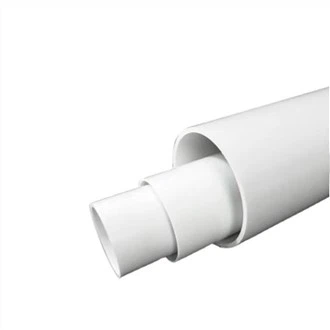
Ensure that you have the right PPR pipes and fittings for your project. As a PPR pipe supplier, I recommend choosing products that meet industry standards. You can explore our range of Plastic Pipe Polypropylene and Plastic Polypropylene Pipes which are of high quality and suitable for various applications.
2. Cutting the PPR Pipes
Once you have your plan and tools ready, it's time to cut the PPR pipes to the required lengths. Use the measuring tape to mark the cutting points on the pipes accurately. Make sure to leave some extra length for adjustments during the installation process.
Place the pipe in the pipe cutter and align the cutting blade with the marked line. Slowly rotate the cutter around the pipe, applying gentle pressure. Keep rotating until the pipe is completely cut through. After cutting, use the deburring tool to remove any burrs or rough edges from the cut end of the pipe. This is important because rough edges can prevent a proper seal when the pipe is joined to a fitting.
3. Preparing the Welding Machine
Before using the welding machine, make sure it is clean and in good working condition. Plug in the welding machine and set the temperature according to the manufacturer's instructions. The typical welding temperature for PPR pipes is around 260°C (500°F). Allow the machine to heat up for a few minutes until it reaches the desired temperature.
While the machine is heating up, select the appropriate welding nozzles for the pipe and fitting sizes. The nozzles should fit snugly onto the heating element of the welding machine. Make sure the nozzles are clean and free from any debris or melted plastic from previous uses.
4. Joining the Pipes and Fittings
Once the welding machine has reached the correct temperature, it's time to start joining the pipes and fittings. First, insert the end of the pipe into one side of the heated welding nozzle and the corresponding fitting onto the other side of the nozzle. Hold them in place for the recommended time, usually around 5 - 10 seconds depending on the pipe size.


After the specified time, quickly and steadily remove the pipe and fitting from the welding machine. Align the pipe and fitting and insert the pipe into the fitting. Apply gentle pressure and hold the joint in place for a few seconds to allow the plastic to cool and solidify. Do not twist or move the joint during this cooling period, as this can cause a weak bond or a leak.
Continue this process for all the pipe and fitting connections in your plumbing system. Make sure to check the alignment of each joint as you go to ensure a straight and proper installation. If you are unsure about any aspect of the joining process, you can refer to our Plumbers Ppr Pipe section for more detailed information.
5. Testing the System
After all the pipes and fittings are joined together, it's important to test the plumbing system for leaks. Close all the faucets and valves in the system. Connect the water supply to the pipes and slowly turn on the water. Check all the joints and connections for any signs of leakage.
If you notice a leak, turn off the water supply immediately. In most cases, a leak can be fixed by reheating the joint and realigning the pipe and fitting. If the leak persists, you may need to cut out the faulty joint and replace it with a new one.
6. Installation Considerations
When installing PPR pipes, there are a few additional considerations to keep in mind. PPR pipes should be installed away from direct sunlight, as prolonged exposure to sunlight can cause the pipes to degrade over time. You can use insulation materials to protect the pipes if they are installed in areas with high sunlight exposure.
Also, make sure to support the pipes properly. Use pipe clips or hangers at regular intervals to prevent the pipes from sagging or moving. This is especially important for long runs of pipes or pipes that are installed in areas with high vibration.
Contact for Purchase and Consultation
If you are planning a plumbing project and need high - quality PPR pipes and fittings, look no further. As a leading PPR pipe supplier, we offer a wide range of products that are suitable for both residential and commercial applications. Our products are designed to meet the highest industry standards, ensuring durability and reliability.
Whether you have questions about the installation process, need advice on the right products for your project, or are ready to place an order, we are here to help. Contact us to start a discussion about your plumbing needs, and let's work together to ensure a successful installation.
References
- "PPR Pipe Installation Guide", Various Plumbing Industry Publications
- Manufacturer's Instructions for PPR Pipes and Welding Machines