Hey there! I'm a supplier of HDPE pipes, and I've seen firsthand the challenges that come with installing these pipes in rocky areas. It's not an easy feat, but with the right approach, it can be done smoothly. In this blog, I'll share some tips and tricks on how to install HDPE pipes in a rocky area.
Understanding the Challenges of Rocky Areas
First off, let's talk about why rocky areas pose such a problem for HDPE pipe installation. Rocks can be sharp and jagged, which means they can easily damage the pipes during installation. They can also make it difficult to dig trenches, which are essential for laying the pipes. Plus, the uneven surface of rocky terrain can cause the pipes to shift or settle unevenly over time, leading to leaks or other issues.
Planning Your Installation
Before you even start digging, it's crucial to do some planning. This involves assessing the area where you'll be installing the pipes. You need to know the layout of the rocks, the depth of the soil, and any potential obstacles that could get in the way. A site survey can be really helpful here. It'll give you a clear picture of what you're up against and help you come up with a game plan.
Once you have a good understanding of the area, you can start to plan the route for your pipes. Try to avoid areas with large, solid rocks if possible. If you can't avoid them, you'll need to figure out how to work around or through them. You might also want to consider the slope of the land. Pipes should be installed with a slight slope to ensure proper drainage.
Choosing the Right Pipes
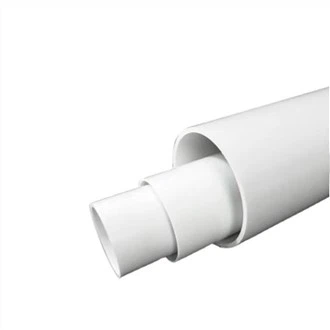
When it comes to installing HDPE pipes in a rocky area, not all pipes are created equal. You'll want to choose pipes that are strong and durable enough to withstand the rough conditions. For example, Hdpe Pipe 16mm Dia is a great option for smaller-scale projects. It's flexible and can handle a bit of bending without breaking.
If you're working on a larger project, like a Garden Drip Irrigation Tubing system, you might need something a bit more heavy-duty. Plastic Pipes Hdpe come in a variety of sizes and thicknesses, so you can choose the one that's right for your needs.
Preparing the Trench
Digging the trench is one of the most important steps in the installation process. In a rocky area, this can be a real challenge. You'll likely need to use some heavy equipment, like a backhoe or a rock saw, to break up the rocks and create a smooth, level trench. Make sure the trench is wide enough to accommodate the pipes with some extra space on either side for bedding material.
The depth of the trench will depend on a few factors, including the type of pipes you're using and the local climate. In general, the pipes should be buried deep enough to protect them from freezing temperatures and any potential damage from surface activity. A good rule of thumb is to bury the pipes at least 12 inches below the surface, but you might need to go deeper in colder climates.
Once the trench is dug, you'll need to line the bottom with a layer of bedding material. This could be sand, gravel, or a special pipe bedding compound. The bedding material helps to cushion the pipes and prevent them from coming into direct contact with the rocks. It also provides a stable base for the pipes to rest on.
Installing the Pipes
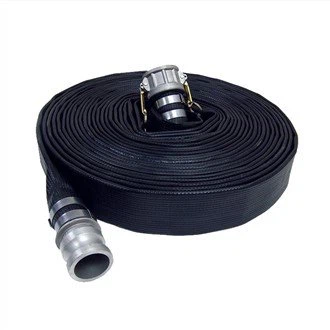
Now it's time to install the pipes. Start by laying the pipes in the trench, making sure they're properly aligned and connected. HDPE pipes are usually joined together using heat fusion or mechanical connectors. Heat fusion creates a strong, leak-proof bond between the pipes, but it requires special equipment and training. Mechanical connectors are easier to install, but they might not be as durable in the long run.
As you're installing the pipes, be careful not to let them come into contact with any sharp rocks. You might want to use a pipe protector or a layer of fabric to wrap the pipes and prevent them from getting scratched or damaged. Once the pipes are in place, you can start to backfill the trench.
Backfilling the Trench
Backfilling the trench is another important step in the installation process. You'll want to use a material that's free of rocks and other debris. Sand or soil is a good choice. Start by filling the trench around the pipes with a layer of backfill material, making sure to pack it down firmly. This helps to prevent the pipes from shifting or settling.
As you're backfilling, be careful not to put too much pressure on the pipes. You don't want to crush them or cause them to crack. It's a good idea to backfill the trench in layers, compacting each layer as you go. This will help to ensure that the pipes are properly supported and protected.
Once the trench is filled, you can add a layer of topsoil on top. This will help to blend the area in with the surrounding landscape and prevent erosion.
Testing the System
After the pipes are installed and the trench is backfilled, it's important to test the system to make sure it's working properly. You can do this by filling the pipes with water and checking for any leaks. If you find any leaks, you'll need to repair them before you can use the system.
It's also a good idea to test the water pressure in the system. Make sure it's within the recommended range for the pipes you're using. If the water pressure is too high, it could cause the pipes to burst. If it's too low, the system might not work properly.
Maintenance and Care
Once the system is up and running, you'll need to perform regular maintenance and care to keep it in good condition. This includes checking the pipes for any signs of damage or wear, cleaning the filters, and flushing the system periodically.
If you notice any problems with the pipes, like leaks or cracks, it's important to address them as soon as possible. Ignoring the problem could lead to more serious issues down the road.
Conclusion
Installing HDPE pipes in a rocky area can be a challenging task, but with the right planning, preparation, and equipment, it can be done successfully. By following the tips and tricks outlined in this blog, you can ensure that your pipes are installed properly and will last for many years to come.
If you're interested in purchasing HDPE pipes for your project, or if you have any questions about installation or maintenance, don't hesitate to reach out. I'm here to help you every step of the way.


References
- "HDPE Pipe Installation Guide" - Various industry publications
- Personal experience as an HDPE pipe supplier