Repairing a leaking PVC pipe can be a straightforward process if you have the right tools and knowledge. As a PVC pipe supplier, I've seen firsthand the importance of being able to fix leaks promptly to prevent further damage and save on water costs. In this blog post, I'll guide you through the steps of repairing a leaking PVC pipe, from identifying the problem to completing the repair.
Step 1: Identify the Leak
The first step in repairing a leaking PVC pipe is to identify the source of the leak. This may seem obvious, but sometimes leaks can be hidden or difficult to detect. Start by looking for signs of water damage, such as wet spots on the floor or walls, mold or mildew growth, or a musty smell. You can also listen for the sound of running water or check your water meter to see if it's moving when no water is being used.
Once you've identified the general area of the leak, use a flashlight to inspect the PVC pipe for visible cracks, holes, or loose connections. Pay close attention to joints, elbows, and other areas where the pipe may be under stress. If you're having trouble finding the leak, you can try using a pressure tester to pinpoint the exact location.
Step 2: Gather Your Tools and Materials
Before you start repairing the leaking PVC pipe, you'll need to gather the necessary tools and materials. Here's a list of what you'll typically need:
- Pipe cutter or hacksaw
- Sandpaper or emery cloth
- PVC primer
- PVC cement
- Replacement PVC pipe or fitting
- Measuring tape
- Safety glasses and gloves
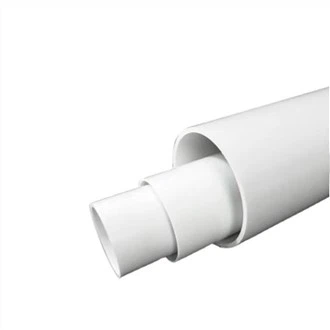
Make sure you have the correct size and type of PVC pipe and fitting for your repair. You can find a wide selection of Plastic 5 Inch Diameter Pvc Pipe, 32 Inch Diameter Pvc Pipe, and Plastic 1 Inch Pvc Pipe on our website.
Step 3: Turn Off the Water Supply
Before you start cutting or working on the PVC pipe, it's important to turn off the water supply to the affected area. This will prevent water from flowing out of the pipe and causing further damage. Locate the main water shut-off valve for your home or building and turn it clockwise to shut off the water. If you're unsure where the main shut-off valve is, you can contact your local water utility company for assistance.
Once you've turned off the water supply, open a faucet or two to relieve the pressure in the pipes. This will make it easier to work on the pipe and prevent any water from spraying out when you cut it.


Step 4: Cut Out the Damaged Section
Using a pipe cutter or hacksaw, carefully cut out the damaged section of the PVC pipe. Make sure to cut the pipe straight and cleanly to ensure a proper fit for the replacement section. Measure the length of the damaged section and cut a replacement piece of PVC pipe to the same length.
Use sandpaper or emery cloth to smooth the edges of the cut pipe and the replacement piece. This will help the PVC primer and cement adhere better and create a stronger bond.
Step 5: Prime and Cement the Pipe
Apply PVC primer to the outside of the replacement pipe and the inside of the fitting. The primer helps to clean and prepare the surface of the PVC for the cement. Make sure to apply the primer evenly and let it dry for a few minutes.
Next, apply PVC cement to the primed surfaces. The cement creates a permanent bond between the pipe and the fitting. Make sure to apply the cement generously and evenly, covering the entire surface.
Step 6: Join the Pipe and Fitting
Quickly insert the replacement pipe into the fitting and twist it a quarter turn to ensure a proper fit. Hold the pipe and fitting together for a few seconds to allow the cement to set. Make sure the joint is straight and aligned correctly.
If you're repairing a leak in a joint, you may need to use a coupling or other fitting to connect the two pieces of pipe. Follow the same steps for priming and cementing the fitting and joining the pipe.
Step 7: Allow the Cement to Dry
After joining the pipe and fitting, allow the cement to dry for at least 24 hours before turning the water supply back on. This will give the cement enough time to fully cure and create a strong, watertight seal.
During the drying process, make sure to keep the repaired area dry and avoid putting any stress on the joint. You can also use clamps or other supports to hold the pipe in place while the cement dries.
Step 8: Test the Repair
Once the cement has dried, turn the water supply back on and check for any leaks. Open a faucet or two to allow the water to flow through the pipes and check for any signs of water leakage. If you notice any leaks, turn off the water supply immediately and repeat the repair process.
If the repair is successful, you can enjoy a leak-free PVC pipe and peace of mind knowing that your plumbing system is in good working order.
Conclusion
Repairing a leaking PVC pipe is a relatively simple process that can save you time and money in the long run. By following these steps and using the right tools and materials, you can fix a leaky PVC pipe quickly and easily.
As a PVC pipe supplier, we're committed to providing high-quality products and excellent customer service. If you have any questions or need help with your PVC pipe repair, please don't hesitate to contact us. We're here to help you find the right solutions for your plumbing needs.
If you're in the market for PVC pipes or fittings, we invite you to browse our website and explore our wide selection of products. We offer a variety of sizes and types of PVC pipes to meet your specific requirements. Whether you need Plastic 5 Inch Diameter Pvc Pipe, 32 Inch Diameter Pvc Pipe, or Plastic 1 Inch Pvc Pipe, we have you covered.
Contact us today to discuss your PVC pipe needs and get a quote. We look forward to working with you!
References
- "PVC Pipe Installation Guide." PVC Pipe Association.
- "How to Repair a Leaking PVC Pipe." Family Handyman.
- "PVC Pipe Fittings and Joints." The Spruce.