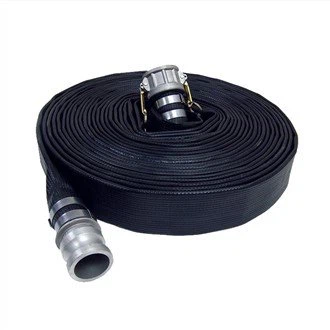
Hey there! As a supplier of hydraulic hoses, I've seen firsthand the importance of proper installation. A well - installed hydraulic hose can significantly enhance the performance and lifespan of your hydraulic system, while a poorly installed one can lead to leaks, system failures, and even safety hazards. So, let's dive into how to install a hydraulic hose properly.
Step 1: Planning and Preparation
Before you even start with the actual installation, you need to do some planning. First off, measure the length of the hose you need accurately. You don't want a hose that's too short or too long. A short hose can put unnecessary stress on the connections, and a long one might get tangled up, which isn't good for the system.
Also, make sure you choose the right type of hose for your application. There are different hoses designed for various pressures, temperatures, and fluids. For example, if you're dealing with high - pressure hydraulic systems, you'll need a hose that can handle that kind of force. And if you're working with a specific fluid, like E85 fuel, you should use a hose that's compatible with it. Check out our E85 Fuel Hose for more info on hoses suitable for such applications.
Gather all the necessary tools for the job. You'll typically need a wrench, a cutter if you need to trim the hose, and a deburring tool to smooth out the cut edges. And of course, have some clean rags on hand to keep things tidy.
Step 2: Cutting the Hose
If you need to cut the hose to the right length, do it carefully. Use a sharp cutter designed for hydraulic hoses. A dull cutter can crush the hose instead of making a clean cut, which can affect the connection. Make sure the cut is straight and perpendicular to the axis of the hose.
After cutting, use a deburring tool to remove any rough edges or burrs. These can cause problems when you're making the connection and can also damage the seals over time. A smooth, clean cut is essential for a proper and leak - free connection.
Step 3: Selecting and Preparing the Fittings
The fittings are crucial for connecting the hose to the hydraulic system. Choose the right type of fitting based on the connection points in your system. There are different types, such as straight fittings, elbow fittings, and tee fittings. Make sure the fitting size matches the hose size.
Before installing the fitting, clean it thoroughly. Remove any dirt, debris, or rust that might be on the fitting. You can use a clean rag and some solvent to do this. Also, check the fitting for any signs of damage, like cracks or dents. A damaged fitting can lead to leaks and system failures.
Step 4: Attaching the Fittings to the Hose
Now it's time to attach the fittings to the hose. There are different methods for this, but the most common one is using a crimping machine. If you're using a crimping machine, follow the manufacturer's instructions carefully. The machine should be set to the correct crimp diameter for the hose and fitting combination.
First, slide the sleeve (if required) onto the hose. Then insert the fitting into the hose. Make sure it goes in all the way and is properly seated. Place the hose and fitting assembly into the crimping machine and activate it. The machine will compress the sleeve or the fitting onto the hose, creating a secure connection.
If you don't have a crimping machine, some fittings can be installed using a clamp. In this case, make sure the clamp is tightened evenly around the fitting and the hose to prevent leaks.
Step 5: Installing the Hose in the System
Once the fittings are attached to the hose, it's time to install the hose in the hydraulic system. Start by making sure the connection points in the system are clean. Remove any dirt or debris from the ports.
Connect one end of the hose to the system first. Use a wrench to tighten the fitting, but be careful not to over - tighten it. Over - tightening can damage the fitting and the connection points. Tighten it just enough to create a seal.
Then, route the hose carefully through the system. Avoid sharp bends or kinks in the hose. A sharp bend can restrict the flow of fluid and increase the pressure in the hose, which can lead to premature failure. If you need to make a bend, make sure it has a large enough radius.
Finally, connect the other end of the hose to the system in the same way. Double - check all the connections to make sure they're tight and secure.
Step 6: Testing the Installation
After installing the hose, it's important to test the system to make sure there are no leaks. Start the hydraulic system and let it run at a low pressure first. Check all the connections for any signs of leakage, such as dripping fluid or a hissing sound.
If you find a leak, shut down the system immediately. Tighten the connection slightly and retest. If the leak persists, you may need to disassemble the connection, check for damage, and reinstall it correctly.
Once you've confirmed that there are no leaks at low pressure, gradually increase the pressure to the normal operating pressure of the system. Keep an eye on the connections and the hose itself. Make sure there are no signs of bulging, swelling, or other abnormal behavior in the hose.
Step 7: Maintenance and Inspection
Even after a successful installation, it's important to perform regular maintenance and inspections on the hydraulic hose. Check the hose and the connections for any signs of wear, damage, or leakage on a regular basis. Look for cracks, abrasions, or signs of corrosion on the hose.


If you notice any problems, replace the hose or the fitting as soon as possible. Regular maintenance can extend the lifespan of the hose and prevent costly system failures.
In addition to hydraulic hoses for industrial applications, we also offer hoses for other uses. For example, if you're looking for a garden hose, we have some great options. Our 50 ft Flexible Garden Hose is perfect for watering your garden, and our Best Garden Hose For Pressure Washer is ideal for pressure washing tasks.
If you're in the market for hydraulic hoses or have any questions about installation, feel free to reach out to us. We're here to help you find the right products for your needs and ensure a proper installation. Whether you're a professional in the industry or a DIY enthusiast, we've got the expertise and the products to support you. So, don't hesitate to contact us for more information and to start a procurement discussion.
References
- "Hydraulic Hose Installation Guide" by industry experts
- Manufacturer's manuals for hydraulic hoses and fittings